Earlier in the year I bought a NAS (Network Attached Storage) Server and started using it to store my images on.
I've since had a number of people ask me about my set-up so here's a short post about how to use a NAS for Lightroom and your images.
There are lots of NAS models on the market so I'm not able to cover set-up and configuration in this post. The most popular ones have quite a lot of information about them on the internet already. I have a Synology DS413 and the Synology website has good information about setting it up.
How Lightroom Works
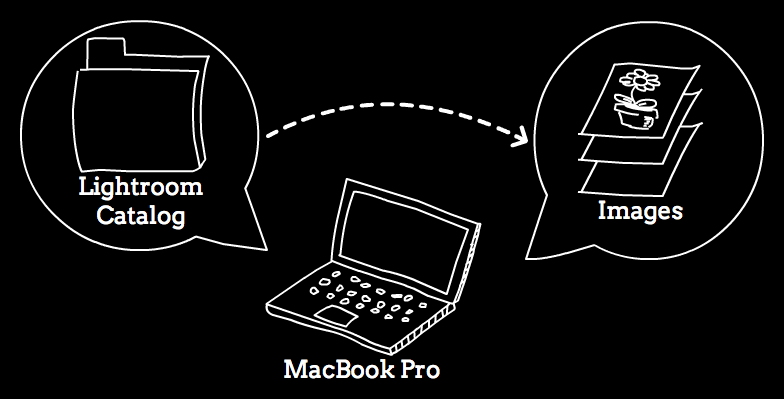
You may be aware that a Lightroom catalog is a database that stores the locations of your images and all of the changes that you've made to them in Lightroom.
It doesn't actually store the images within the catalog. Instead when you import images into Lightroom, it puts them somewhere on your computer that you ask it to and then stores the location within the database. When you view an image within Lightroom it goes away to that location to load the file up.
Most of the time Lightroom and the images are on the same computer so it's not something that we care about - though when we run a backup we need to make sure that we include both the catalog location and the image location.
Lightroom Doesn't Like Networks
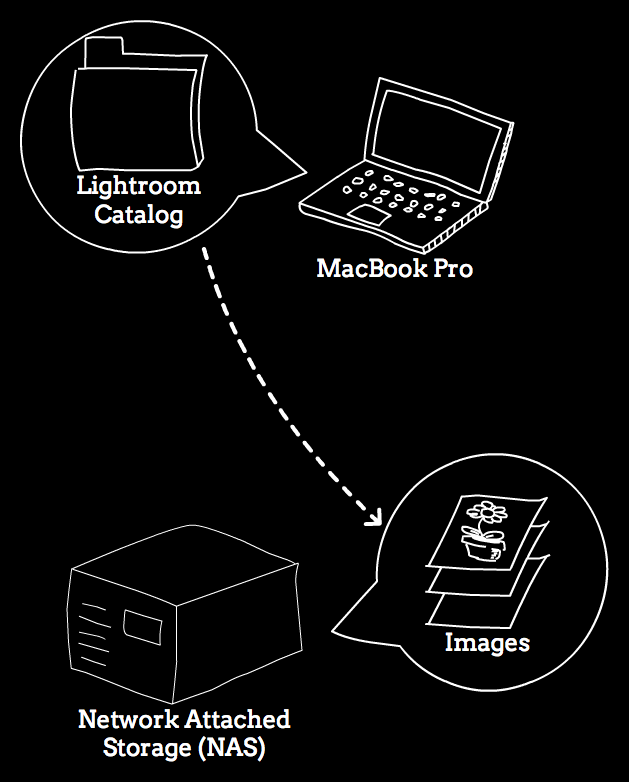
When it comes to using a NAS the first reality to deal with is that Lightroom doesn't like networks. To be more specific you can't open a Lightroom catalog that's stored on a network. This is due to the way that Lightroom has been designed and its underlying, single-machine technology. To be honest even if you could open it from a network location then the performance would be frustratingly slow anyway.
However the good news is that Lightroom can reference and use images that are stored on the network. So when it comes to a NAS our strategy is to have the Lightroom catalog on our local machine and store the images on the NAS.
Before doing anything please make a fresh backup of your Lightroom catalog and image files in case something goes wrong!
Copying your Images to the NAS
Assuming that you currently have your images on the same machine as your Lightroom catalog, the first thing that we need to do is copy the images to the NAS. On my NAS I created a dedicated 'shared folder' which looks just like any other volume on my Mac. This way I can make sure that all of my images are in one place and without any other junk on the drive.
I always advocate having a single top level folder ('Photos') with a date-based hierarchy of sub-folders underneath. This makes management of image files much easier - backing up, locating and in this case moving images. All I need to do is copy the 'Photos' folder from its current location to the dedicated shared folder on the NAS.

Tell Lightroom to use the NAS Images
Once the image files have been copied over to the NAS we need to tell Lightroom to to look for the images on the NAS instead of their old location. Again having the images under one folder makes life easier - we just tell Lightroom to look in the 'Photos' folder on the NAS rather than on the local drive. To do this follow these steps.


Lightroom will now load images from the NAS, and that's that. The Folders pane in the left hand panel should now list your NAS volume rather than your local hard drive.
It's worth checking that you don't have any missing files at this point to make sure everything has transferred properly (go to the Library menu and then 'Find All Missing Photos').
One thing you must remember to do is update the destination when you next import files otherwise they will be imported to the old location. When in the Import dialog, change the Destination folder to appropriate location on your NAS.
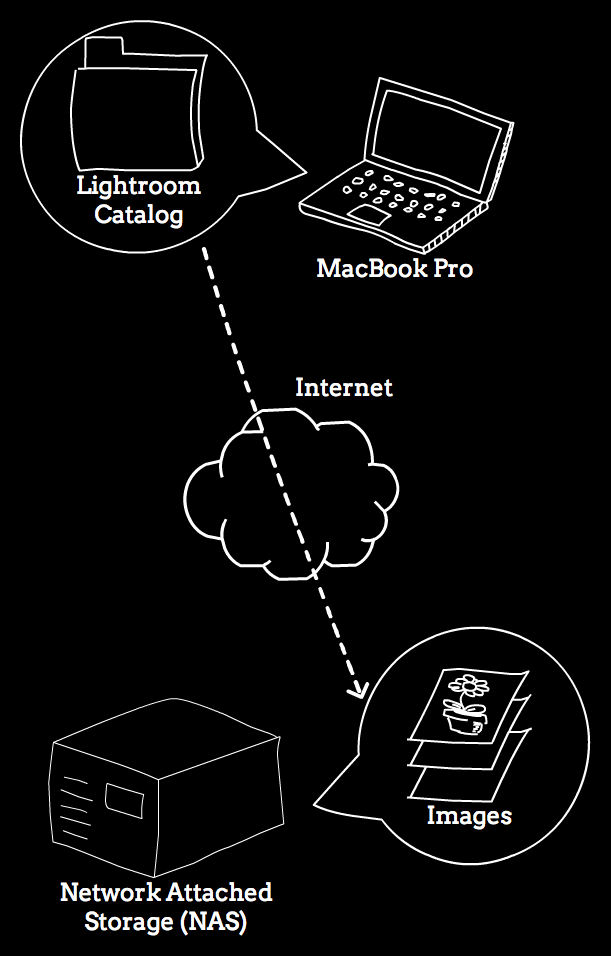
Accessing your Images Over the Internet
One great advantage of storing your images on a NAS is that you can access them over the internet. Obviously this is going to be much slower than on your local network, but it's a workable solution if you need them.
The first thing you need to do is make your NAS visible to the internet. The steps required to perform this vary from NAS to NAS so you'll have to check the manual/internet for your particular model. This is a key feature of all NASs however so should be pretty straightforward. If you have a Synology NAS you can find the instructions here.
Once you've done that you need to connect to your NAS. On my MacBook I go to Finder and then Connect To Server (Cmd+K).
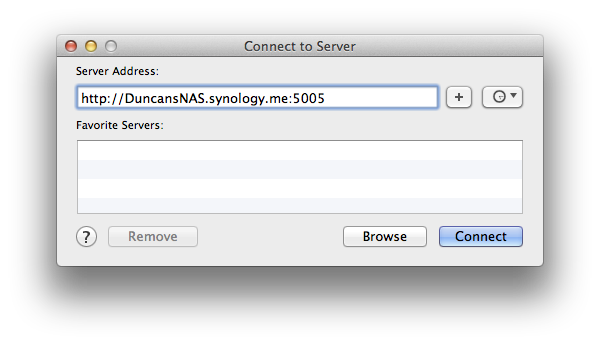
Type in the address of the NAS that you will have created in the previous step and press Connect. All being well a new volume appear in Finder for the NAS, and you can browse and open files over the internet.
To then get Lightroom working with the image files on the NAS, we follow the same steps as above. In Lightroom use ''Update Folder Location' on the top level 'Photos' folder. When the 'Update Folder Location' dialog appears we choose the 'Photos' folder on the NAS volume that we've just connected to.
This will again update Lightroom to use this location when it tries to find any image files.
When you get back home remember to repeat this step to update the folder location to use the local NAS volume rather than the 'NAS via internet' volume.
As a final point though the above works fine and is the simplest way of using a NAS I found the performance disappointing compared to what I was used to with local hard drives. Instead I've implemented a hybrid system whereby I store some images on my internal SSD drive, my image archive on an external RAID drive and then back all of that up to the NAS which then gives me access to my images over wifi or the internet.
It's more complicated and requires some more technical knowledge so it's really not for everyone. I'll write a follow-up post outlining how my set-up works (including the system of backups I use) for anyone that's interested.